Want a tool that can cut curves, shapes, and straight lines? Then you need to learn about the jigsaw! This blog will introduce the basics of using a jigsaw, helping beginners get started quickly and create outstanding woodworking projects.
What Is a Jigsaw?
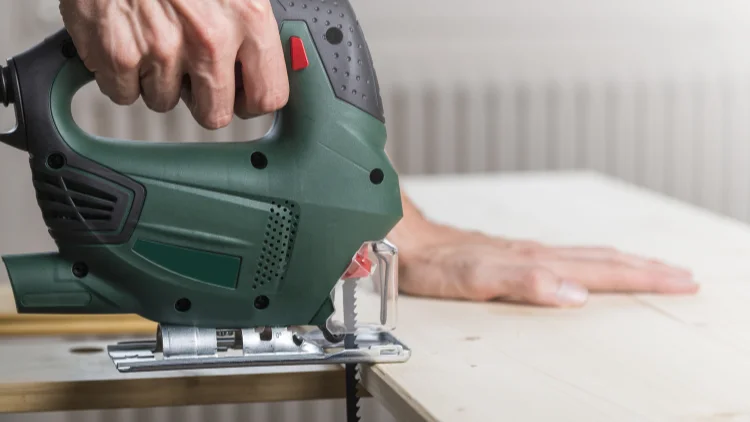
A jigsaw is a power tool designed for cutting irregular shapes and curves. It is more flexible than a standard saw, making it ideal for precision work. Since the blade moves from below, it is generally considered safer.
Common Uses of a Jigsaw
- Cutting curves and shapes
- Making large holes in wood
- Performing straight cuts
Step 1: Preparation
Wear Protective Gear
When using any power tool, safety comes first! Protect yourself by wearing:
Safety goggles: Prevent wood chips from flying into your eyes.
Earplugs/Earmuffs: Reduce noise exposure and protect your hearing.
Dust mask: Prevent inhalation of fine particles, especially when cutting laminate or MDF.
Fitted clothing: Avoid loose clothing, jewelry, or long hair getting caught in the blade.
Choose the Right Jigsaw and Blade
We recommend using T-shank blades as they allow for quick blade changes and secure installation. U-shank blades require tools for installation and may loosen during cutting, making them less ideal.
Blade selection based on material:
Wood: Standard woodworking blades.
Metal: High TPI (Teeth Per Inch) metal-cutting blades.
Plastic: Fine-tooth or reverse-tooth blades to minimize chipping.
Blade TPI Guide:
Low TPI (below 10): Fast cutting, but rough surface.
High TPI (above 20): Slow cutting, but smoother finish.
Blade Cutting Direction:
Up-cut blades: Provide a cleaner bottom surface but may leave burrs on top.
Down-cut blades: Provide a cleaner top surface, ideal for cutting on the “good side” of the material.
When selecting a blade, choose one that is at least 1 inch longer than the material’s thickness to ensure a smooth cut.
Step 2: Installing and Adjusting the Jigsaw
Installing/Changing the Blade (T-Shank Jigsaw)
Disconnect the power (unplug or remove the battery).
Locate the quick-release lever (usually on the side or front of the jigsaw).
Open the lever and remove the old blade.
Insert the new blade, ensuring it locks into place.
Close the lever and pull on the blade to confirm it’s secure.
Adjusting the Base Angle (Bevel Cuts)
Find the angle adjustment mechanism (usually a knob or hex screw) at the bottom of the jigsaw.
Loosen the screw and adjust the base to the desired angle (0°–45°).
Tighten the screw to lock the base in place.
Setting the Cutting Mode (Orbital Action)
Orbital action (aggressive cutting mode): The blade moves slightly forward and backward for faster, more aggressive cuts but leaves rougher edges. Best for softwood and plastics. Avoid using it on hardwood and metal.
Setting the Cutting Speed
Low speed: Ideal for hardwood, metal, and fine cuts (prevents burning).
High speed: Best for softwood, plastics, and large cuts (improves efficiency).
Step 3: Securing the Workpiece and Marking Cut Lines
Secure the Workpiece
Use clamps to prevent movement during cutting.
Avoid cutting materials in mid-air—ensure they are properly supported.
Check below the material for wires or pipes to avoid damage.
Since a jigsaw produces vibrations, always secure thin materials before cutting.
Mark the Cut Line
Use a pencil or chalk to mark the cut line on the material.
For straight cuts, use a ruler, guide rail, or straightedge.
For curved cuts, mark key points to help guide the blade smoothly.
Step 4: Start Cutting
Powering On the Jigsaw
Press the jigsaw’s base firmly against the material.
Align the blade with the cut line without touching the workpiece.
Pull the trigger and let the blade reach full speed before starting the cut.
Slowly push the jigsaw forward, allowing the blade to cut naturally. Do not force it forward, as this can cause the blade to bend or go off track.
Step 5: Cutting Techniques
Straight Cuts
Use a guide or ruler to ensure accurate straight cuts.
Keep the base stable and flat against the material to avoid jumping.
Curved Cuts
Use a narrow scrolling blade for easier maneuvering. Choose a narrow scrolling blade for easy turning.
Reduce the feed speed and let the blade follow the curve.
Avoid sharp turns and give the blade enough time to turn. You can cut multiple small curves and then trim them.
Internal Hole Cutting
Drill a pilot hole in the material (slightly larger than the blade width).
Insert the blade into the hole and start cutting along the marked line.
Rotate the workpiece as appropriate to ensure the blade has sufficient room to move.
Plunge Cutting (Without a Pilot Hole)
Raise the front end of the jigsaw to an angle of 45° to the material.
Slowly press down to cut into the material.
Once the blade has fully penetrated the material, resume horizontal cutting.
Inserting the cut may produce a rougher cut, suitable for construction or rough processing.

Step 6: Finishing and Cleanup
Turning Off the Jigsaw
Release the trigger and wait for the blade to come to a complete stop before lifting the jigsaw.
Disconnect the power for safety.
Cleaning the Work Area
Remove sawdust and wood chips to inspect the cut quality.
Use sandpaper to smooth rough edges.
Maintaining Your Jigsaw
Remove the saw blade and clean it to prevent jamming.
Check the base and fixing screws to ensure that the jigsaw is in good condition.
Store in a dry area to avoid moisture affecting the life of the motor.
Read more: what is the best power tool brand
Conclusion
That’s your beginner’s guide to using a jigsaw! With practice, you’ll see how versatile this tool is—whether for straight cuts, curves, or internal holes, a jigsaw can handle it all.If you want to provide your team with a more efficient cutting solution? kafuwell can provide professional tool recommendations, bulk purchase support and customized services for corporate customers. Feel free to contact us, we guarantee reliable performance to deliver efficient results.